
Create a Smooth Two-Image Rollover in Divi 5
Sometimes the cleanest hover effect is still the old-school one: show one image normally, then smoothly reveal a second image when the visitor hovers. This works especially well for black-to-color icons, alternate product views, and before/after-style effects.
1. Add Two Image Modules
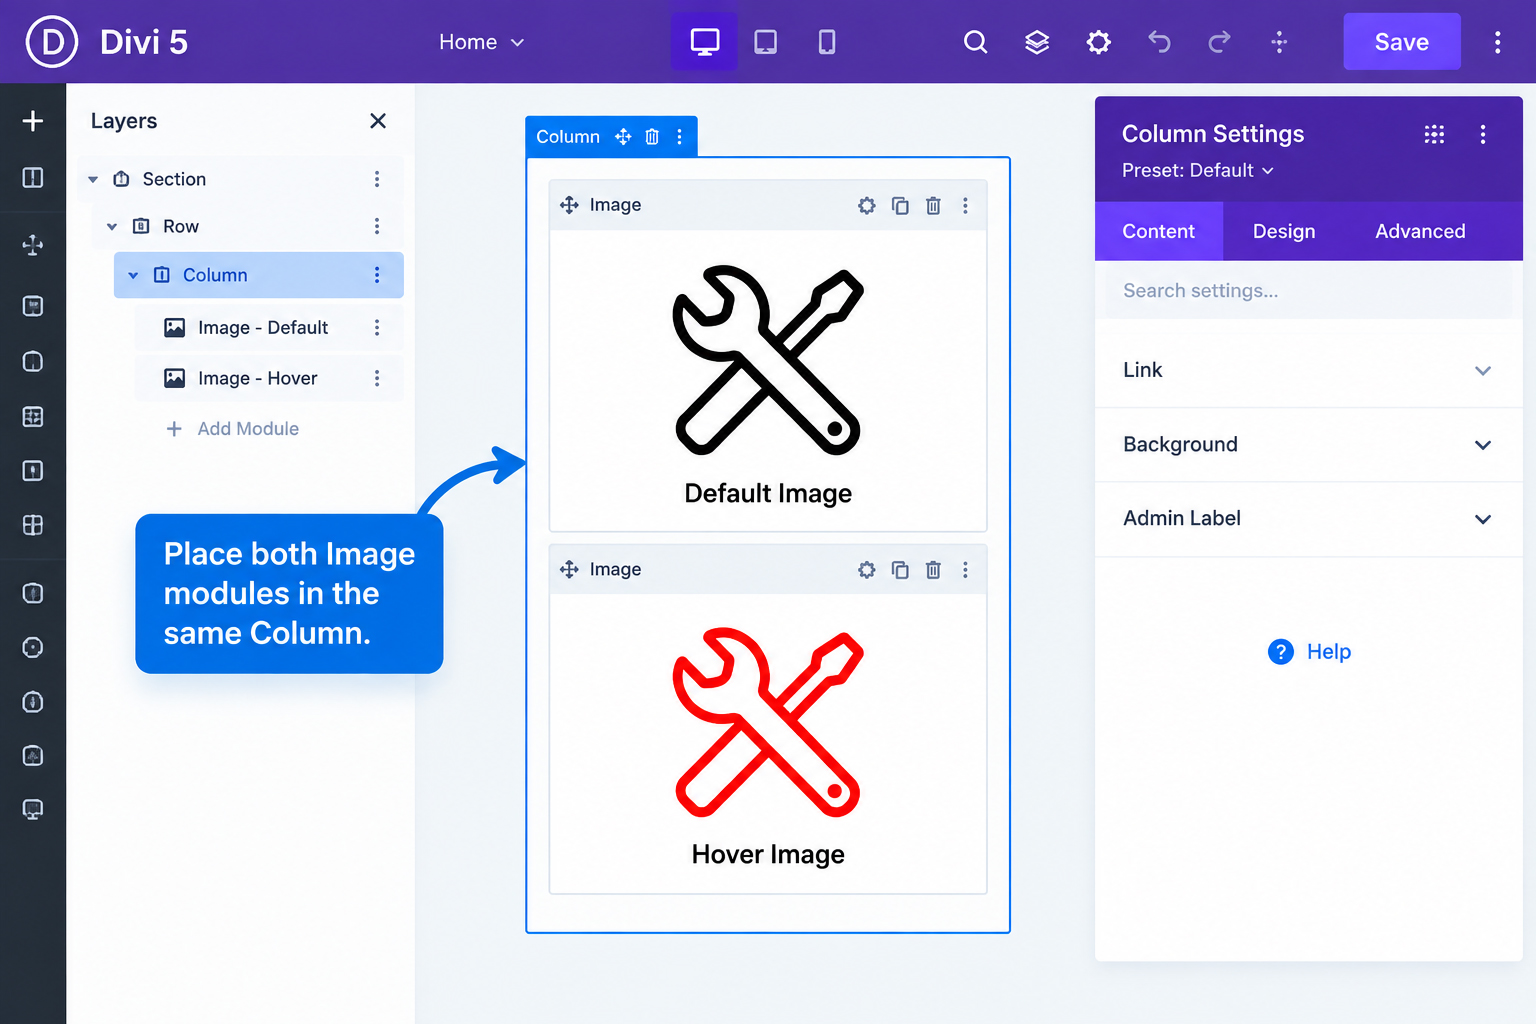
Place two Divi Image modules in the same Column. The first image is the normal/default image. The second image is the version you want to reveal on hover.
2. Give the Column a CSS Class
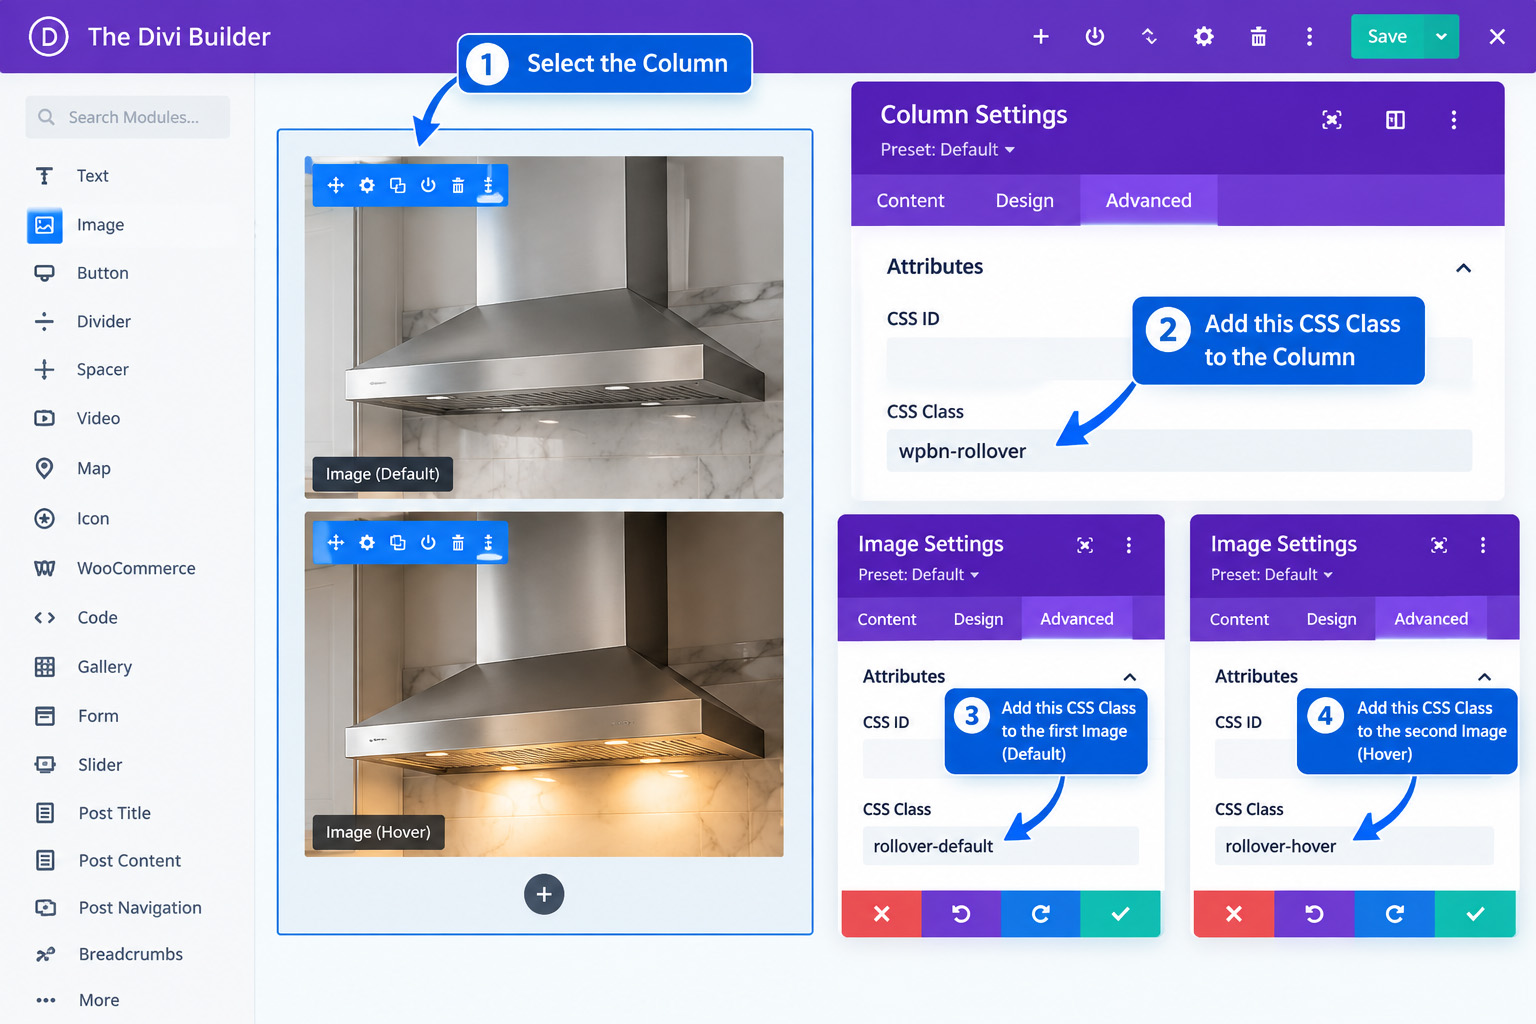
Open the Column settings and add the class wpbn-rollover. In Divi 5, add reusable classes from the element’s Advanced → Attributes controls.
3. Class the Two Image Modules
Give the normal image the class rollover-default and the hover image the class rollover-hover.
4. Add the CSS
Paste the CSS below into Divi → Theme Options → Custom CSS, the page’s Custom CSS area, or another stylesheet.
.wpbn-rollover {
  position: relative;
}

.wpbn-rollover .rollover-default,
.wpbn-rollover .rollover-hover {
  margin: 0 !important;
  transition: opacity .35s ease;
}

.wpbn-rollover .rollover-default {
  position: relative;
  z-index: 1;
}

.wpbn-rollover .rollover-hover {
  position: absolute !important;
  inset: 0;
  z-index: 2;
  opacity: 0;
}

.wpbn-rollover .rollover-default img,
.wpbn-rollover .rollover-hover img {
  width: 100%;
  display: block;
}

.wpbn-rollover:hover .rollover-default {
  opacity: 0;
}

.wpbn-rollover:hover .rollover-hover {
  opacity: 1;
}
5. Adjust the Fade Speed
The transition is set to .35s. Try .2s for a quicker rollover or .5s for a softer fade.
6. Test Desktop and Mobile
Hover is mainly a desktop interaction. On touch devices, visitors will simply see the default image, so make sure that first image still works on its own.